Quick start
LiveEdit is a powerful software platform designed for live show preparation and production. Before diving into its extensive features, this quick start guide will walk you through the basics.
Downloading LiveEdit
If you haven't installed LiveEdit yet, download the latest version from our official website.
First Launch
Upon first launch, LiveEdit displays a login window. Designed for collaborative work, LiveEdit requires a personal account for usage.
- If you have an account, enter your username and password, then click "Sign In."
- If you don't have an account, click "Create your account" to register directly within the app.

Project List
After logging in, LiveEdit automatically retrieves a list of projects to which you have access. These projects could either be created by you or shared with you by other users.
- To open an invited project, select it from the list and click "Open."
- If no projects are visible, you'll need to create a new one.
Creating a New Project
To create a new project:
- Click on the "+" icon at the top left of the project list.
- Name your project.
- Choose your frame rate (24, 25, 29.97, or 30 fps).
- Specify the number of cameras.
- Click "OK"
Your new project will appear in the project list. Select it and click "Open" to launch it.
Creating a Playlist
A LiveEdit project is organized into playlists, which contain individual scenes. For example, a six-week show could have six separate playlists, one for each week.
To create your first playlist:
- Click on the "New Playlist" button at the top left.
- Name your playlist.
- Click "OK."
Creating a Scene
Scenes serve as the musical sequences of your show and contain timelines with tracks like Switcher, Lyrics, and Cues, among others.
To create a new scene:
- Click on the "New Scene" button at the top left.
- Name your scene.
- Click "OK."
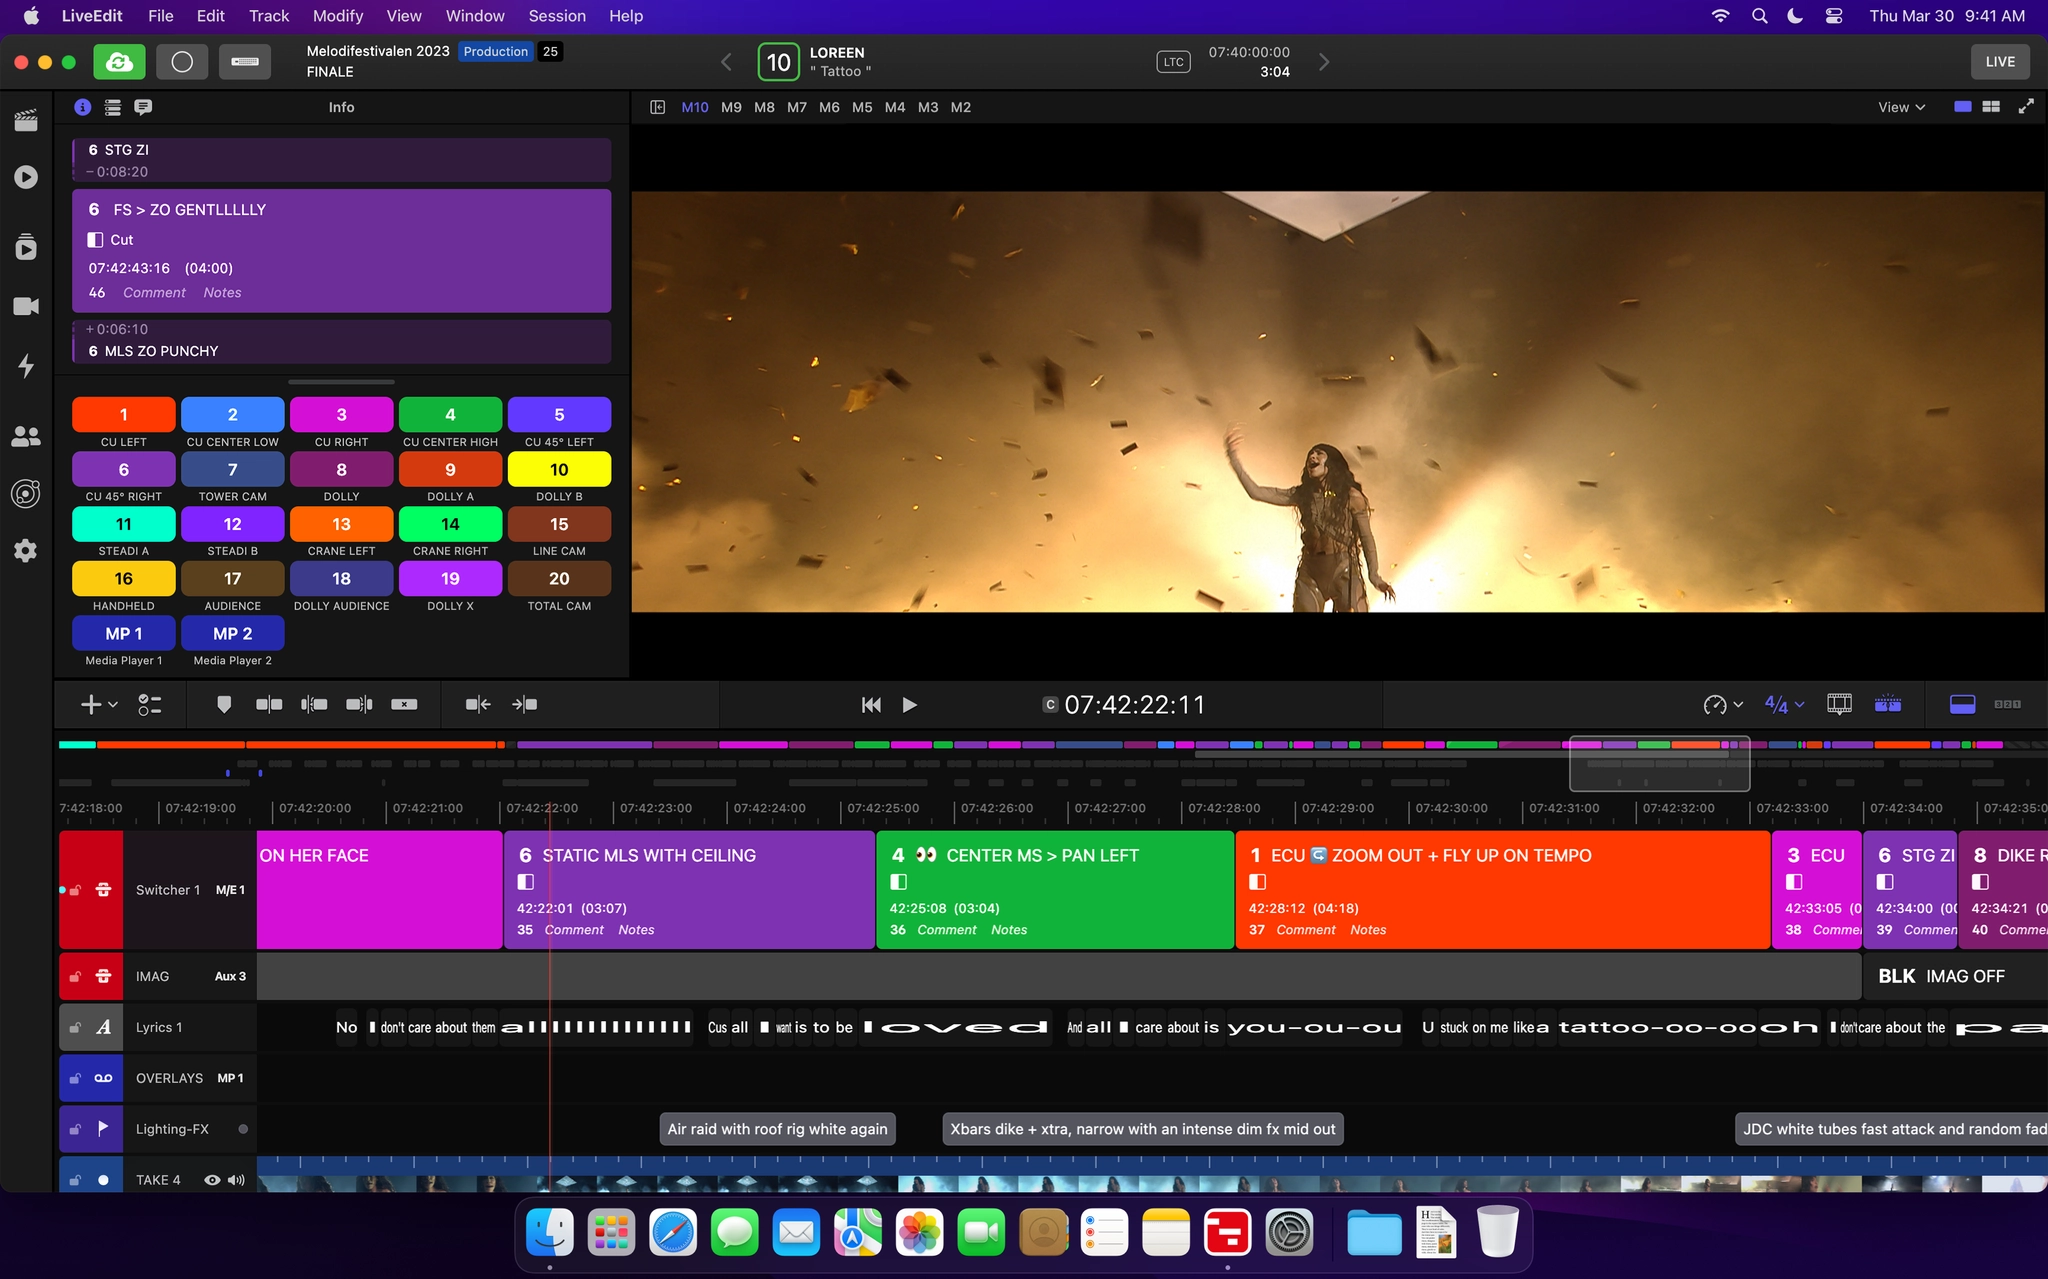
The LiveEdit Workspace
The LiveEdit interface is similar to video editing software and consists of:
- Sidebar: Navigate through playlists and scenes, and access global project settings.
- Inspector: Displays track functionalities, cue information, and a review space for collaborative comments.
- Top Bar: Displays the current scene and allows quick navigation between scenes and modes.
- Viewer: The main area for displaying media.
- Toolbar: Includes frequently used editing buttons and a mini-timeline.
- Timeline: Displays all tracks and their contents.
Importing Media
The first step after creating a scene is importing media. You can drag and drop media files into the Viewer or click the "+" icon on the toolbar to "Import Media."
When importing, you'll be asked whether to use the media locally or upload it to the cloud for shared use.
Good to Know!
- To reposition media: Click and drag it to the desired position.
- To lock a track: Click on the lock symbol in the track header.
Importing Lyrics
Here's a refined and beginner-friendly version of your quick start guide for LiveEdit:
TGetting Started: Quick Start
LiveEdit is a powerful software platform designed for live show preparation and production. Before diving into its extensive features, this quick start guide will walk you through the basics.
Downloading LiveEdit
If you haven't installed LiveEdit yet, download the latest version from our official website.
First Launch
Upon first launch, LiveEdit displays a login window. Designed for collaborative work, LiveEdit requires a personal account for usage.
- If you have an account, enter your username and password, then click "Sign In."
- If you don't have an account, click "Create your account" to register directly within the app.
Project List
After logging in, LiveEdit automatically retrieves a list of projects you have access to. These projects could be created by you or shared with you by other users.
- To open an invited project, select it from the list and click "Open."
- If no projects are visible, you'll need to create a new one.
Creating a New Project
To create a new project:
- Click on the "+" icon at the top left of the project list.
- Name your project.
- Choose your frame rate (24, 25, 29.97, or 30 fps).
- Specify the number of cameras.
- Click "OK."
Your new project will appear in the project list. Select it and click "Open" to launch it.
Creating a Playlist
A LiveEdit project is organized into playlists, which contain individual scenes. For example, a six-week show could have six separate playlists, one for each week.
- To create your first playlist:
- Click on the "New Playlist" button at the top left.
- Name your playlist.
- Click "OK."
Creating a Scene
Scenes serve as the musical sequences of your show and contain timelines with tracks like Switcher, Lyrics, and Cues, among others.
- To create a new scene:
- Click on the "New Scene" button at the top left.
- Name your scene.
- Click "OK."
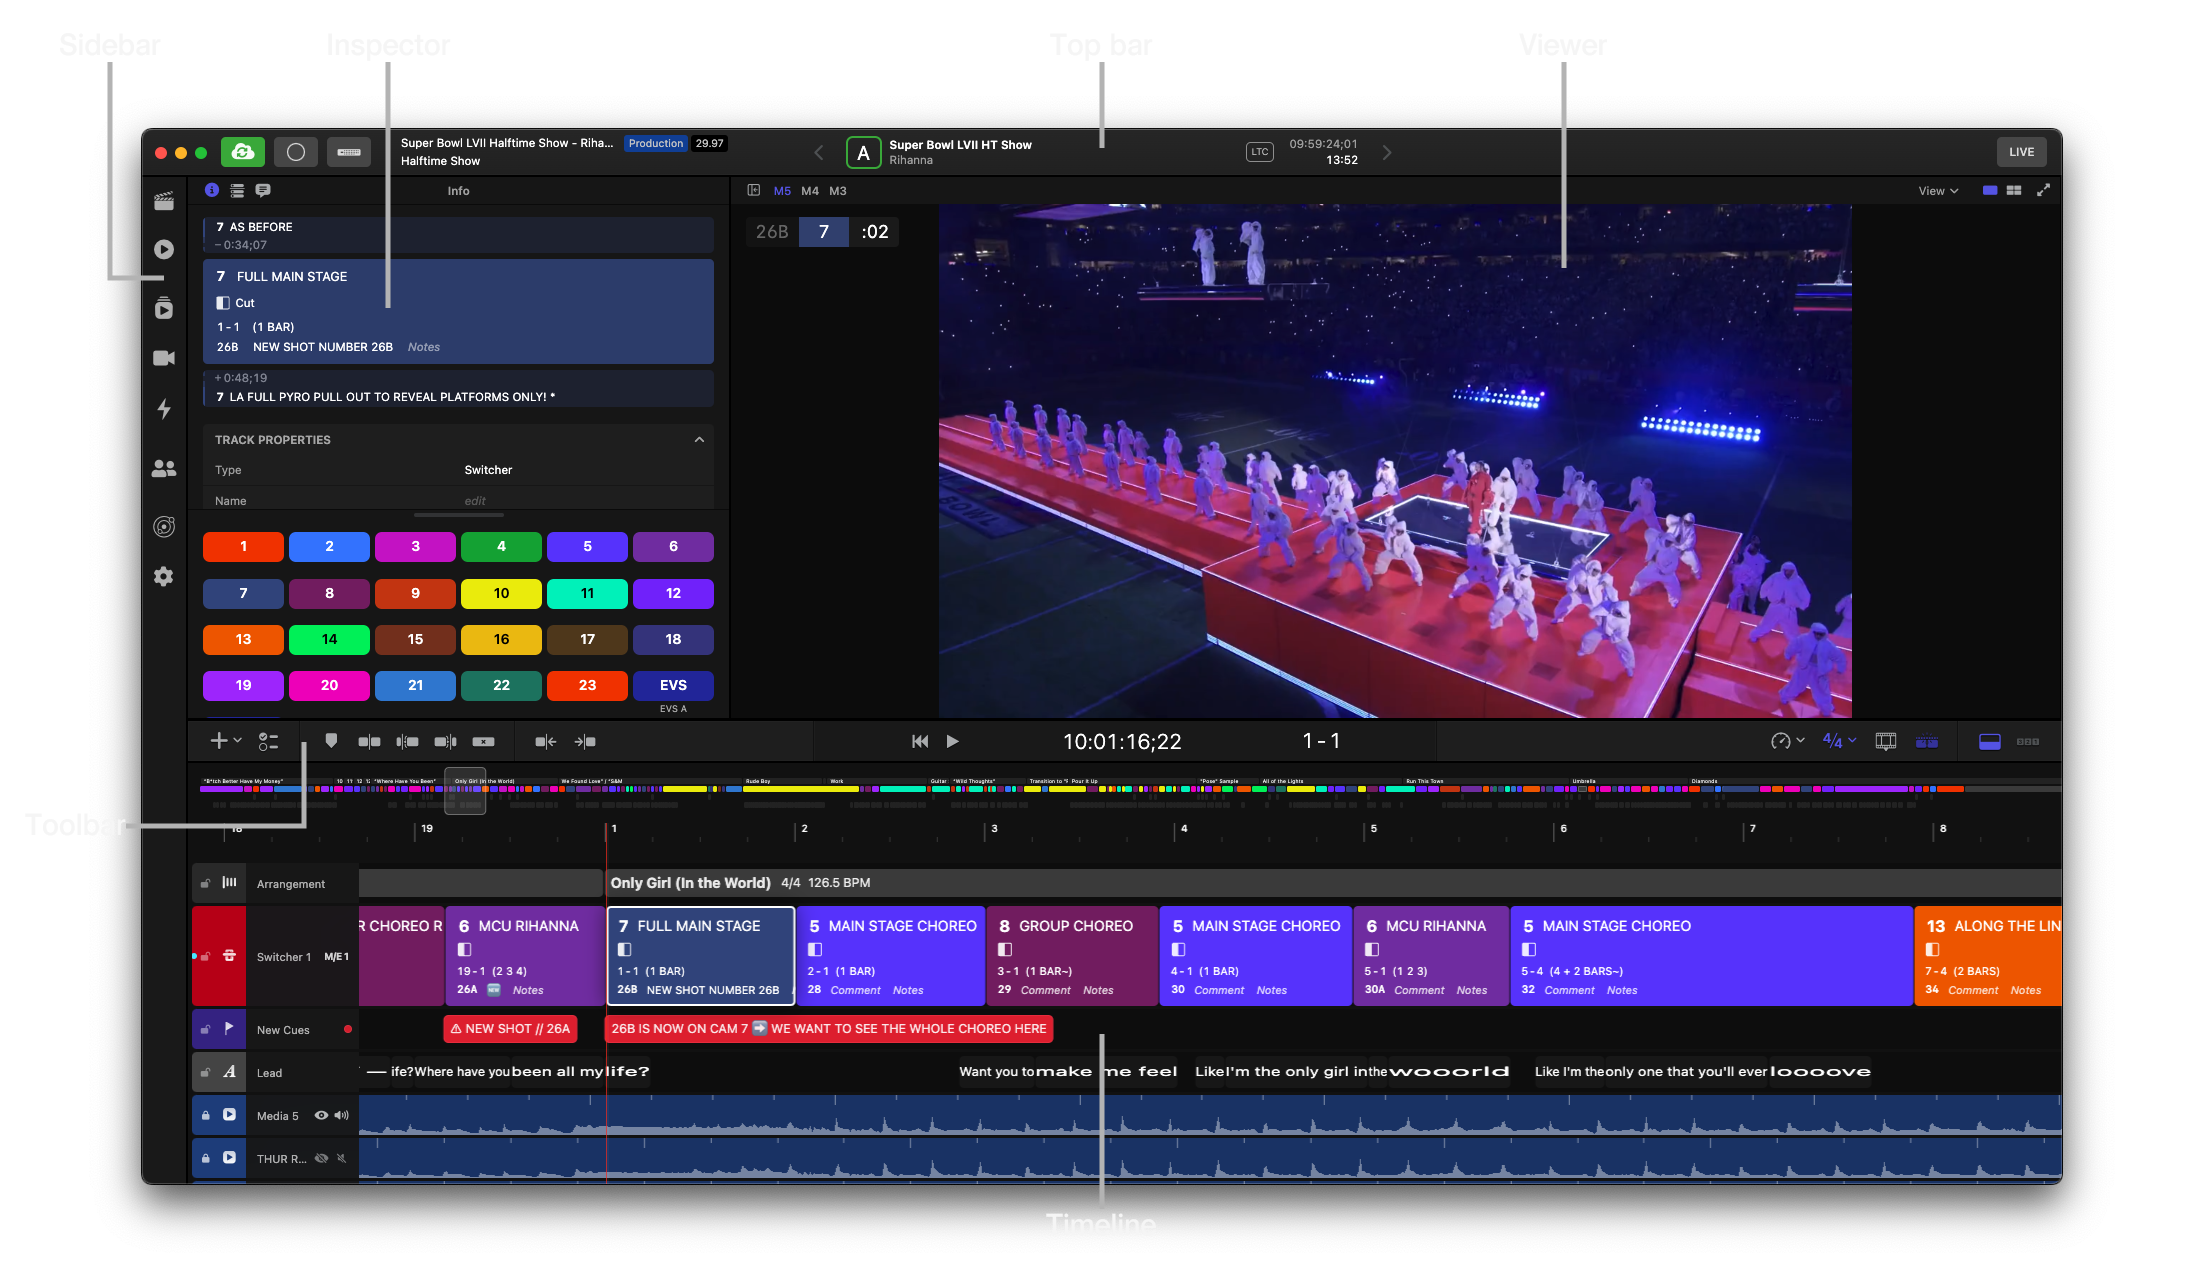
The LiveEdit Workspace
The LiveEdit interface is similar to video editing software and consists of:
- Sidebar: Navigate through playlists and scenes, and access global project settings.
- Inspector: Displays track functionalities, cue information, and a review space for collaborative comments.
- Top Bar: Displays the current scene and allows quick navigation between scenes and modes.
- Viewer: The main area for displaying media.
- Toolbar: Includes frequently used editing buttons and a mini-timeline.
- Timeline: Displays all tracks and their contents.
Importing Media
The first step after creating a scene is importing media. You can drag and drop media files into the Viewer or click the "+" icon on the toolbar to "Import Media."
- When importing, you'll be asked whether to use the media locally or upload it to the cloud for shared use.
Good to Know!
- To reposition media: Click and drag it to the desired position.
- To lock a track: Click on the lock symbol in the track header.
Importing Lyrics
To import lyrics, activate the Lyrics track and paste your lyrics into the input field within the Inspector. Timing the lyrics is a breeze using the 'In' and 'Out' keys.
Editing Shots
Similar to conventional editing software, you'll insert shots from different sources. Double-click on a shot in the timeline to add descriptions.
Inserting Notes
Add cues on the timeline for different departments using a Cues track. Cue roles can be Video, Audio, Lights, SFX, Staging, and Props.
Ready to Become a Pro?
We've crafted various guides to help you navigate and master all that LiveEdit has to offer. Feel free to consult these resources to become a LiveEdit pro in no time.
Thank you for choosing LiveEdit, and we look forward to seeing your creative projects come to life!